A few days ago, I broke my desktop environment while trying out a development branch of Xfce meant to facilitate color management. Well, the branch kinda worked, but removing it afterwards messed up bits and stuff. It happened on a Friday evening, so I was somewhat tired and overconfident, but still I yearned for a quick repair. So of course it was all downhill from here: the package manager filled up with conflicts, the OS lost the NIC location, GRUB had to be reset, the laptop wouldn't boot anymore. A great time to reflect on life mistakes.
The first step to getting everything back together was removing one of the RAM sticks. Sure. Okay.
Long story short, I had to build back my whole laptop environment, which provided me with an excellent opportunity to document my setup. Now, I don't intend to go into details about every part of it, nor does it seem that useful, but obviously you could use the comments below to ask for clarifications. Also, these instructions could definitely be perfected and even more streamlined, but, uh, it's the result which matters the most, y'know.
Instructions below sometimes refer to a $CONFIG_DIR variable. Although most configuration files lack explanations (which I couldn't always provide anyway), you may have a look at this folder here.
Groundwork
Hardware Specs
- MSI GE70 2OE-070XFR laptop, bought in 2013 (discontinued in 2015)
- MS-1757 motherboard w/ Intel Core i7-4700MQ
- Crucial SSD 240GB + Hitachi HDD 750GB
- Kingston DDR3 SODIMM 2*4GB
- Nvidia GeForce GTX 765M + Intel Integrated Graphics
Operating System
Flash a Debian 10 netinst ISO on a USB stick, put it in the laptop, select the Xfce desktop, and you're good to go. Debian does not ship the Realtek Wireless drivers, so you should fetch packages over a wired network, or load thertlwifi_new drivers preemptively on the USB key (see below).Superuser Privileges
su
/usr/sbin/adduser ria sudo
reboot
Contrib & Non-Free Packages
# Add components to /etc/apt/sources.list
deb http://ftp.fr.debian.org/debian/ buster main contrib non-free
deb-src http://ftp.fr.debian.org/debian/ buster main contrib non-free
Applications & Libraries
sudo apt update
sudo apt install linux-headers-4.19.0-5-amd64 gvfs-backends gvfs-fuse \
                 xterm tmux vim vim-pathogen git curl keepassx acpi \
                 thunderbird telegram-desktop chromium deluge rsync \
                 compton vlc evince openvpn net-tools wireshark whois \
                 arduino picocom npm sane simple-scan exiftool sqlite3 \
                 obs-studio libgpod4 gtkpod flac faac faad pkg-config \
                 libreoffice darktable gphoto2 nginx intel-microcode \
                 firmware-realtek bluetooth blueman bluewho pulseaudio-module-bluetooth
Hardware Enablement
Wireless Capability
# Update: the firmware-realtek package may suffice
git clone https://github.com/lwfinger/rtlwifi_new
cd rtlwifi_new && make && sudo make install
Touchpad Tapping
sudo mkdir /etc/X11/xorg.conf.d
sudo cp $CONFIG_DIR/40-libinput.conf /etc/X11/xorg.conf.d
Automount Secondary Drive
sudo mkdir /media/storage2
echo 'UUID=06b95252-b689-49e0-b2d4-e5b40f405c99 /media/storage2 ext4    defaults        0       2' | sudo tee -a /etc/fstab
Toggle Audio Sink Inputs
When plugging in another display (e.g. via HDMI), sound playback does not switch from the laptop. In order to select the right device with keyboard shortcuts, I wrote a short script.sudo cp $CONFIG_DIR/move_sink.sh /usr/local/binAdd Network Printer
# Use the CUPS server at localhost:631 to discover and add new printers


# Alternatively, discover printers with DNS-SD, then paste the URI to CUPS
sudo lpinfo --include-schemes dnssd -v


# Alternatively, HPLIP printers may be added with the hp-setup utility
# Printer location is currently hp:/net/DeskJet_3630_series?ip=192.168.0.13
pip install PyQt4 PyQt5 && hp-setup
Main Utilities
Configure XTerm
cp $CONFIG_DIR/Xresources ~/.Xresources
cp $CONFIG_DIR/tmux.conf ~/.tmux.conf
Configure Bash
cp $CONFIG_DIR/bashrc ~/.bashrc
$CONFIG_DIR/bash_aliases ~/.bash_aliases
Configure Vim
sudo cp $CONFIG_DIR/vimrc /etc/vim/vimrc
mkdir ~/.vim && sudo mkdir /root/.vim
Configure Git
git config --global user.name ria4
git config --global user.email "16877076+ria4@users.noreply.github.com"
Enable Window Tiling
sudo apt install python-gtk2 python-xlib python-dbus python-setuptools libpangox-1.0-0 libpango1.0-0
wget http://ftp.br.debian.org/debian/pool/main/g/gnome-python-desktop/python-wnck_2.32.0+dfsg-3_amd64.deb
sudo dpkg -i python-wnck_2.32.0+dfsg-3_amd64.deb
git clone https://github.com/ssokolow/quicktile
cd quicktile && sudo python2 setup.py install
cd .. && quicktile
cp $CONFIG_DIR/quicktile.cfg .config/quicktile.cfg
Xfce Desktop Environment
Fast Config
# Most xfce settings can be restored immediately
# Just keep an eye out for thunar shortcuts and preferred applications
cp -r $CONFIG_DIR/xfce4/autostart ~/.config
cp -rT $CONFIG_DIR/xfce4/config_xfce4 ~/.config/xfce4
cp -rT $CONFIG_DIR/xfce4/local_share_xfce4 ~/.local/share/xfce4
Xfce Settings → Panel
- Position one panel on the bottom-right corner of the desktop;
- In Display, check Lock panel and set Row Size to 20 pixels;
- In Items, add Clock, Applications Menu, Notification Area, PulseAudio Plugin & Action Buttons;
- In the Applications Menu properties, uncheck Show button title.
Xfce Settings → Keyboard Shortcuts → Application Shortcuts
- Ctrl+Alt+T →
xterm -e 'tmux -2' - Ctrl+Alt+F →
thunar - Ctrl+Alt+A →
darktable - Ctrl+Alt+K →
keepassx /media/storage/ria.kdbx - Ctrl+Alt+X →
/usr/lib/firefox/firefox - Ctrl+Alt+C →
chromium --password-store=basic - Ctrl+Alt+H →
thunderbird - Ctrl+Alt+M →
telegram-desktop - Ctrl+Alt+S →
spotify - Ctrl+Alt+B →
/opt/deadbeef/bin/deadbeef - Ctrl+Alt+V →
vlc - PrtScr →
xfce4-screenshooter -f - Ctrl+PrtScr →
xfce4-screenshooter -w - Ctrl+Alt+0 →
/usr/local/bin/move_sink.sh 0 - Ctrl+Alt+1 →
/usr/local/bin/move_sink.sh 1
Xfce Settings → Window Manager Tweaks
- In Cycling, check Cycle through workspaces and uncheck Draw frame around windows;
- In Accessibility, check Hide title of windows when maximized;
- In Workspaces, uncheck Use mouse wheel to switch workspaces;
- In Compositor, uncheck Enable display compositing.
Xfce Settings → Session and Startup → Application Autostart
# Name: compton
# Description: Screen-tearing-free window compositor
compton --backend glx --paint-on-overlay --vsync opengl-swc
cp $CONFIG_DIR/compton.conf ~/.config/compton/


# Name: quicktile
# Description: Window-tiling keybindings
quicktile --daemonize
Xfce Settings → Session and Startup → Session
thunar→ Neverfirefox→ If runningtelegram-desktop→ Neverxterm→ Never
Xfce Settings → ...
- In Appearance, choose Xfce-dusk (even though there's no Gtk3 support yet);
- In Desktop→Background, select
prises/190430/darktable_exported/_MG_0289.jpg; - In Desktop→Icons, uncheck every default icon except for Trash;
- In Notifications→General, set timeout to 2 seconds;
- In Notifications→Applications, keep only NetworkManager, Thunderbird & Xfce notifications;
- In Power Manager, uh, set attributes to whatever seems appropriate;
- In Preferred Applications→Internet, choose
/usr/lib/firefox/firefoxas default browser; - In Preferred Applications→Utilities, choose
xterm -e 'tmux -2'as default terminal; - In Workspaces→General, keep only one workspace.
Restore Num Lock State
cp $CONFIG_DIR/xfce4.config/xfconf/xfce-perchannel-xml/keyboards.xml ~/.config/xfce4/xfconf/xfce-perchannel-xmlReplace faulty screen locker
sudo apt remove light-locker

# apt will suggest autoremoving lightdm afterwards, but it is to be kept!
# additionally, xscreensaver is a sensible alternative to light-locker
sudo apt install lightdm xscreensaver
Thunar Settings
- In View, select View as compact list;
- In View→Location Selector, select Pathbar Style;
- Add a shortcut to
/media/storage/Pictures/silhouettes/prises/from the sidebar; - Set default applications
mousepadfor text files,ristrettofor pictures, andvlcfor videos.
Firefox Browser
Backport Latest Firefox
sudo apt remove firefox-esr
sudo cp $CONFIG_DIR/firefox-updater /usr/bin && sudo chmod +x /usr/bin/firefox-updater
sudo firefox-updater
New Tab Style
Firefox enables users to override the look of the browser (userChrome.css) and its data contents (userContent.css). I leveraged the latter for displaying dark new-tab pages. In about:config, set layout.css.moz-document.content.enabled=true. When using FF69+, you'll also need to set toolkit.legacyUserProfileCustomizations.stylesheets=true. Then locate the profile root directory in about:profiles (usually a subdir of ~/.mozilla/firefox) and run:cp -r $CONFIG_DIR/chrome $FIREFOX_PROFILE_DIR
Browser Preferences
- Use Settings→Sync Account to import & share bookmarks across devices;
- In Preferences→General→Tabs, uncheck Tabs in recently used order for legacy Ctrl+Shift+Tab;
- In Preferences→Home→Firefox Home Content, remove Highlights and Snippets;
- In Preferences→Search→One-Click Search Engines, remove Amazon, eBay and Twitter;
- Activate Library→Bookmarks→Bookmarking Tools→View Bookmarks Toolbar;
- In Add-ons→Themes, install Deep Dark Blue Forest;
- In Add-ons→Extensions, add DuckDuckGo Privacy Essentials, Facebook Container, LeechBlock NG, Privacy Badger, uBlock Origin and User-Agent Switcher and Manager.
Website Preferences
- For DuckDuckGo, in Settings→General, remove ads, reminders, newsletters, tips...
- For DuckDuckGo, in Settings→Apperance, set:
- Background Color →
#1c1c1c - Header Color →
#333333 - Result Title Color →
#c47f2c - Result Visited Title Color →
#ffba68 - Result Description Color →
#eeeeee - Result URL Color →
#3579a8
- Background Color →
- For Twitter, in Settings and Privacy→General→Display→Background, select Dim.
Web Development
Secure Remote Access
# Deploy configuration files
sudo cp $CONFIG_DIR/router-udp-1194-oriane-config.ovpn $CONFIG_DIR/oriane-login.conf /etc/openvpn/
sudo cp $CONFIG_DIR/hosts /etc/
sudo cp $CONFIG_DIR/ssh_config /etc/ssh/


# SSH through VPN tunnel (alternatively, use aliases tlnvpn & tlnvpnk)
sudo openvpn --config /etc/openvpn/router-udp-1194-oriane-config.ovpn --daemon
ssh tln
sudo kill -9 $(ps aux | \
               grep "openvpn --config /etc/openvpn/router-udp-1194-oriane-config.ovpn --daemon" | \
               grep -v grep -m 1 | \
               awk '{print $2}')
MongoDB Database
# Add MongoDB repository to get the right package
wget -qO - https://www.mongodb.org/static/pgp/server-4.2.asc | sudo apt-key add -
echo "deb http://repo.mongodb.org/apt/debian $(lsb_release -cs)/mongodb-org/4.2 main" | sudo tee /etc/apt/sources.list.d/mongodb-org-4.2.list
sudo apt update && sudo apt install -y mongodb-org


# Dump an archive from the tln server, and restore it locally
mongodump --db critique_django --gzip --archive=~/tln/mongo_bkp/critique.YYYY-MM-DD.gz
mongorestore --gzip --archive=critique.YYYY-MM-DD.gz
Python Virtual Environment
sudo update-alternatives --install /usr/bin/python python /usr/bin/python2.7 1
sudo update-alternatives --install /usr/bin/python python /usr/bin/python3.7 2
sudo apt install python3-pip
pip install virtualenvwrapper
source ~/.local/bin/virtualenvwrapper.sh
# This last statement is already included in .bashrc
Django Framework
# Either untar the website or clone it (but media content will be missing)
tar xf tln.tar.gz && cd tln
git clone https://github.com/ria4/tln && cd tln


# Recreate the tln virtual environment
mkvirtualenv tln
pip install tzlocal requests \
            django==2.0 django-extensions django-mongoengine django-photologue django-blog-zinnia


# Rebuild db.sqlite3 in case of conflicts
find . -path "*/migrations/*.py" -not -name "__init__.py" -delete
find . -path "*/migrations/*.pyc"  -delete
rm db.sqlite3
./manage.py makemigrations && ./manage.py migrate
SQIP Placeholders
npm init
npm install sqip@canary sqip-cli@canary
            sqip-plugin-primitive@canary sqip-plugin-svgo@canary sqip-plugin-data-uri@canary
Pygments Syntax Highlighting
# Import Molopeach style, a custom blend of Molokai and Peachpuff styles
pip install pygments
cp $CONFIG_DIR/molopeach.py ~/.local/lib/python3.7/site-packages/pygments/styles


# Regenerate the CSS style if necessary (it may require additional editing)
pygmentize -f html -S molopeach -a div.molopeach >> ~/tln/static/css/blog.css


# Highlight code snippets
pygmentize -O style=molopeach -o highlighted_snippet.html snippet.py
Music Management
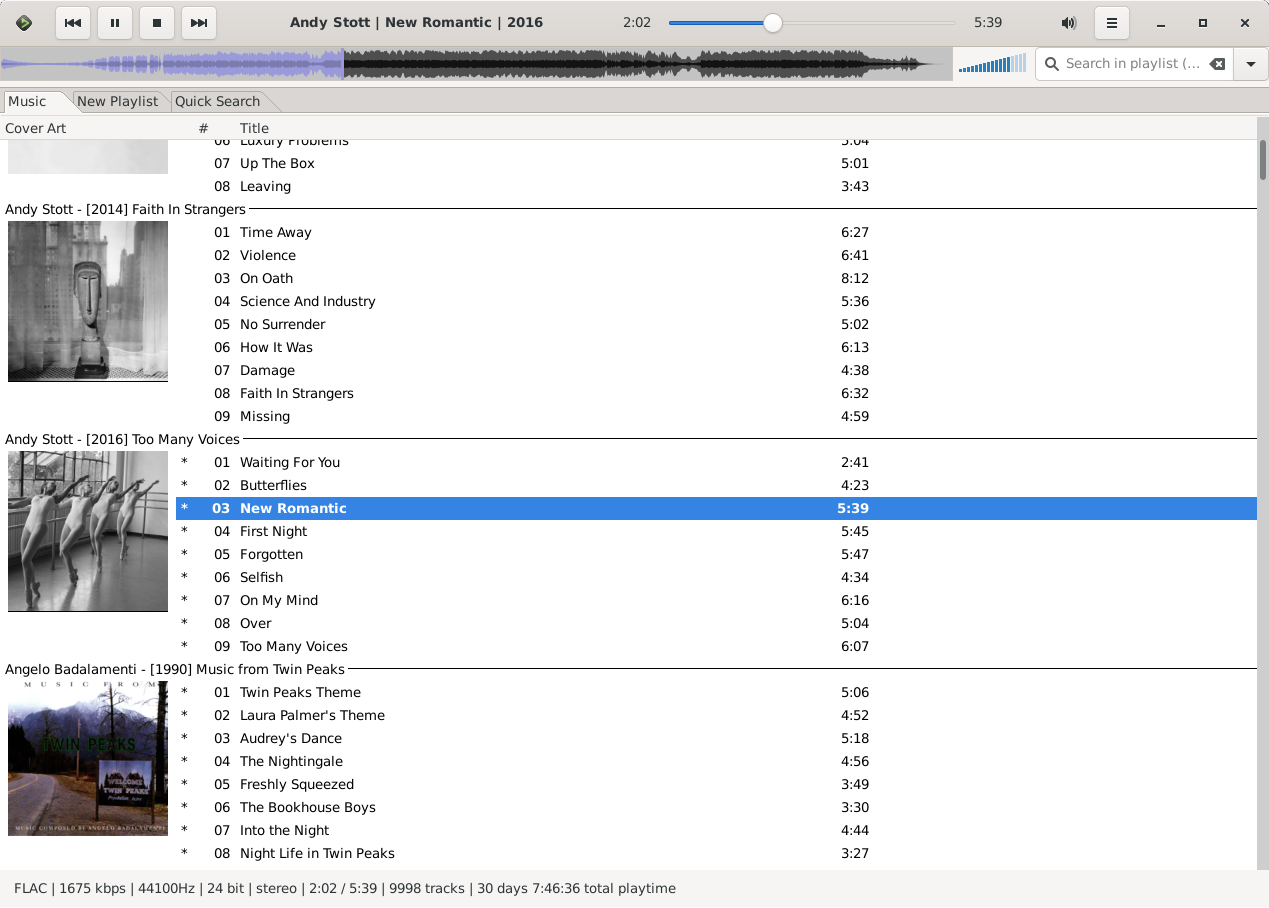
Install DeaDBeeF
- Packages
- Get & install stable package from DeaDBeeF website
- Get & unzip plugins for Headerbar, Quick Search and Waveform Seekbar
- Move plugins to
/opt/deadbeef/lib/deadbeef/
- Fast Config
cp $CONFIG_DIR/config.deadbeef ~/.config/deadbeef/config- Manual Config
- In Design mode, create Splitter (top and bottom):
- Put Waveform Seekbar, Volume bar and Quick search on top
- And Playlist with tabs below
- In Preferences→GUI, set Titlebar text while playing to
%artist% | %title% '|' %year% - In Preferences→Appearance→Playlist, use Bold for Playing track
- In Edit→Sort by, set
%album artist% %year% %album% %discnumber% %tracknumber% - Right-click the playlist columns header:
- In Group by, set
%album artist% - ['['%year%']' ]%album% - Edit play/pause column with
$if($replace(%codec%,MP3,),*) - Edit tracknum column with
%discnumber%$if(%discnumber%,.)%tracknumber% - In Preferences→Hotkeys, set:
- Toggle Pause →
c - Previous/Next →
x/v - Quick search (GTK3) →
s - Volume Down/Volume Up →
-/+
Install Spotify Client
sudo sh -c 'echo "deb http://repository.spotify.com stable non-free" >> /etc/apt/sources.list.d/spotify.list'
sudo apt-key adv --keyserver hkp://keyserver.ubuntu.com:80 --recv-keys 931FF8E79F0876134EDDBDCCA87FF9DF48BF1C90
sudo apt update && sudo apt install spotify-client
Sync iPod
Around 2011, I was offered an iPod Nano 6G, and it's revealed to be a nice travel companion. There's a DeaDBeeF plugin for iPod syncing but it hasn't been updated for years and C bindings seem to be obsolete. Thegtkpod package offers iPod management as a standalone application, but the 6th gen Nano is a mischievous product with non-standard checksums, so it must be patched with an additional obscure library from a nice guy who reverse-engineered Apple technology.git clone https://github.com/denydias/libhashab
cd libhashab && sudo install_64bit.sh
Application Software
Add Thunderbird Accounts
- [redacted]@outlook.com
- [redacted]@gmail.com
- contact@oriane.ink
- contact@chezmamie.org
Configure Telegram
- In Options, select Night Mode;
- Search for stickers Twitch Emotes, Youtube Shitposts, Heroes of Might and Maratzie & Triforce Heroes.
Install Arduino Toolkit
# Install the Arduino IDE and create the sketchbook directory
sudo apt install arduino && arduino


# Install the Ino toolkit
sudo update-alternatives --set python /usr/bin/python2.7
pip install ino
sudo adduser ria dialout


# Retrieve a few libraries
wget https://github.com/FastLED/FastLED/archive/v3.1.3.tar.gz
wget https://github.com/z3t0/Arduino-IRremote/archive/2.1.0.tar.gz
wget http://downloads.arduino.cc/libraries/github.com/greiman/SdFat-1.1.0.zip
tar xf v3.1.3.tar.gz && mv FastLED-3.1.3 ~/sketchbook/libraries/FastLED
tar xf 2.1.0.tar.gz && mv Arduino-IRremote-2.1.0 ~/sketchbook/libraries/IRRemote
unzip SdFat-1.1.0.zip && mv SdFat-1.1.0 ~/sketchbook/libraries/SdFat


# Clone the main project
cd ~/sketchook && git clone https://github.com/ria4/sara


# Check the microcontroller link
cd sara && ino build && ino upload
Install DisplayCAL
sudo update-alternatives --set python /usr/bin/python2.7
sudo apt install libwxgtk3.0-gtk3-0v5 libwxbase3.0-0v5 \
                 python-wxversion python-wxgtk3.0 python-psutil libsdl2-mixer-2.0-0
wget https://displaycal.net/download/Debian_9.0/amd64/DisplayCAL.deb
sudo dpkg -i DisplayCAL.deb
displaycal
# Make sure ArgyllCMS updates at first launch
Install Docker
sudo apt -y install apt-transport-https gnupg2 software-properties-common
curl -fsSL https://download.docker.com/linux/debian/gpg | sudo apt-key add -
sudo add-apt-repository "deb [arch=amd64] https://download.docker.com/linux/debian $(lsb_release -cs) stable"
sudo apt update && sudo apt -y install docker-ce docker-compose
sudo systemctl restart docker.service
sudo usermod -aG docker ria
Capture Canon camera
sudo modprobe v4l2loopback
gphoto2 --set-config depthoffield=1 --stdout --capture-movie | ffmpeg -i - -vcodec rawvideo -pix_fmt yuv420p -threads 0 -f v4l2 /dev/video0
Random PDF Tip
# Lower PDF size according to dPDFSETTINGS quality
gs -sDEVICE=pdfwrite -dCompatibilityLevel=1.4 -dNOPAUSE -dQUIET -dBATCH \
   -dPDFSETTINGS=/ebook -sOutputFile=output.pdf input.pdf
Gaming
# Install Nvidia drivers for Optimus support
# Steam might try to remove the i386 packages, so reinstall them if necessary
sudo apt install bumblebee-nvidia primus libgl1-nvidia-glx
sudo dpkg --add-architecture i386 && sudo apt update
sudo apt install primus-libs:i386 libgl1-nvidia-glx:i386 libxxf86vm1:i386 libglu1-mesa:i386 libopenal1:i386 libxrandr2:i386


# Warning: this part might be useless, but this is black magic territory and I have no idea what I'm doing
git clone https://git.videolan.org/git/ffmpeg/nv-codec-headers.git
cd nv-codec-headers && make && sudo make install
sudo apt install nvidia-cuda-toolkit


# Leverage the GPU for MPEG encoding
# Building ffmpeg requires the last two options —the rest is for show
sudo apt build-dep ffmpeg
sudo apt install yasm nasm build-essential automake autoconf libtool libcurl4-openssl-dev libavcodec-extra
git clone git://git.videolan.org/ffmpeg.git && cd ffmpeg
./configure --prefix=/usr/local --extra-version=1+b3 --toolchain=hardened \
            --libdir=/usr/lib/x86_64-linux-gnu --incdir=/usr/include/x86_64-linux-gnu --shlibdir=/usr/lib/x86_64-linux-gnu \
            --cc=cc --cxx=g++ --enable-gpl --disable-stripping --enable-shared --disable-decoder=libopenjpeg \
            --enable-avresample --enable-avisynth --enable-gnutls --enable-ladspa --enable-libass --enable-libbluray \
            --enable-libbs2b --enable-libcaca --enable-libcdio --enable-libebur128 --enable-libflite --enable-libfontconfig \
            --enable-libfreetype --enable-libfribidi --enable-libgme --enable-libgsm --enable-libmodplug --enable-libmp3lame \
            --enable-libopenjpeg --enable-libopus --enable-libpulse --enable-librubberband --enable-librtmp --enable-libshine \
            --enable-libsnappy --enable-libsoxr --enable-libspeex --enable-libssh --enable-libtheora --enable-libtwolame \
            --enable-libvorbis --enable-libvpx --enable-libwavpack --enable-libwebp --enable-libx265 --enable-libxvid \
            --enable-libzvbi --enable-openal --enable-opengl --enable-x11grab --enable-libdc1394 --enable-libiec61883 \
            --enable-libzmq --enable-frei0r --enable-chromaprint --enable-libopencv --enable-libx264 --enable-pic \
            --enable-nonfree --enable-nvenc
make -j4 && sudo make install


# Also, take a look at Wine maybe?
sudo apt install steam playonlinux winetricks
# Update on Nov. 2021 - Follow up-to-date documentation

# https://wiki.debian.org/NvidiaGraphicsDrivers
# remove non-legacy drivers if present
sudo apt install nvidia-legacy-390xx-driver firmware-misc-nonfree

# https://wiki.debian.org/NVIDIA%20Optimus
# remove bumblebee if present & use PRIME render offload
__NV_PRIME_RENDER_OFFLOAD=1 __GLX_VENDOR_LIBRARY_NAME=nvidia-legacy-390xx <crypt_dir>/start.sh

# keyboard shortcut command would be:
# bash -c '__NV_PRIME_RENDER_OFFLOAD=1 __GLX_VENDOR_LIBRARY_NAME=nvidia-legacy-390xx /home/ria/games/GOG\ Games/Crypt\ of\ the\ NecroDancer/start.sh'

# https://docs.nvidia.com/video-technologies/video-codec-sdk/ffmpeg-with-nvidia-gpu/
# in obs, use advanced output mode for streaming & select FFMPEG VAAPI encoder
# device should be card0 (otherwise you'll get a warning about uninstalled nvenc encoder)
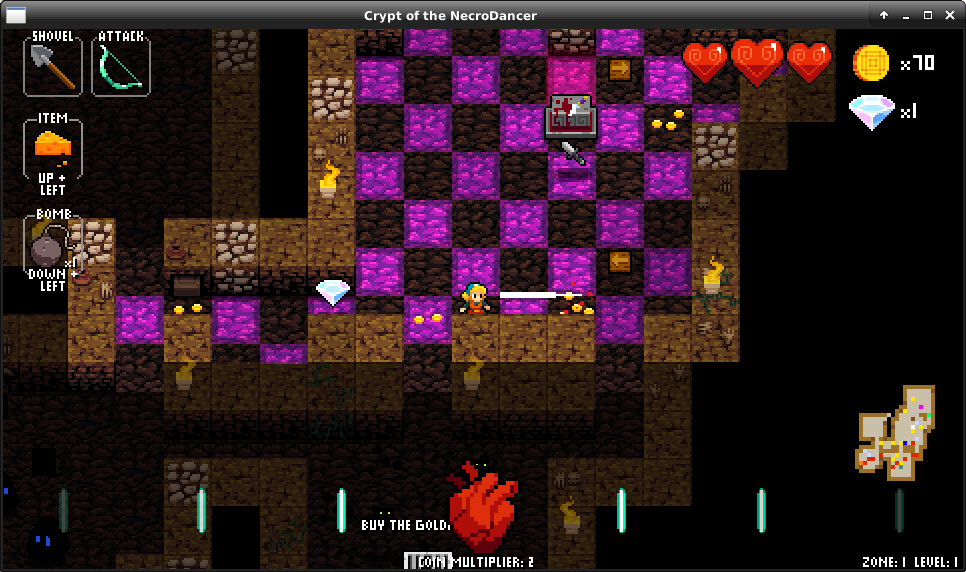
Now you know how I'm able to stream the GOG release of Crypt of the Necrodancer. On Linux.
With GPU-offloading for both the game and the video encoder. Still on Linux.
Also, I fight with a glass bow on the first level.
Ain't that the epitome of cool.